My Umbrel home server for privacy: Bitcoin node + open-source apps
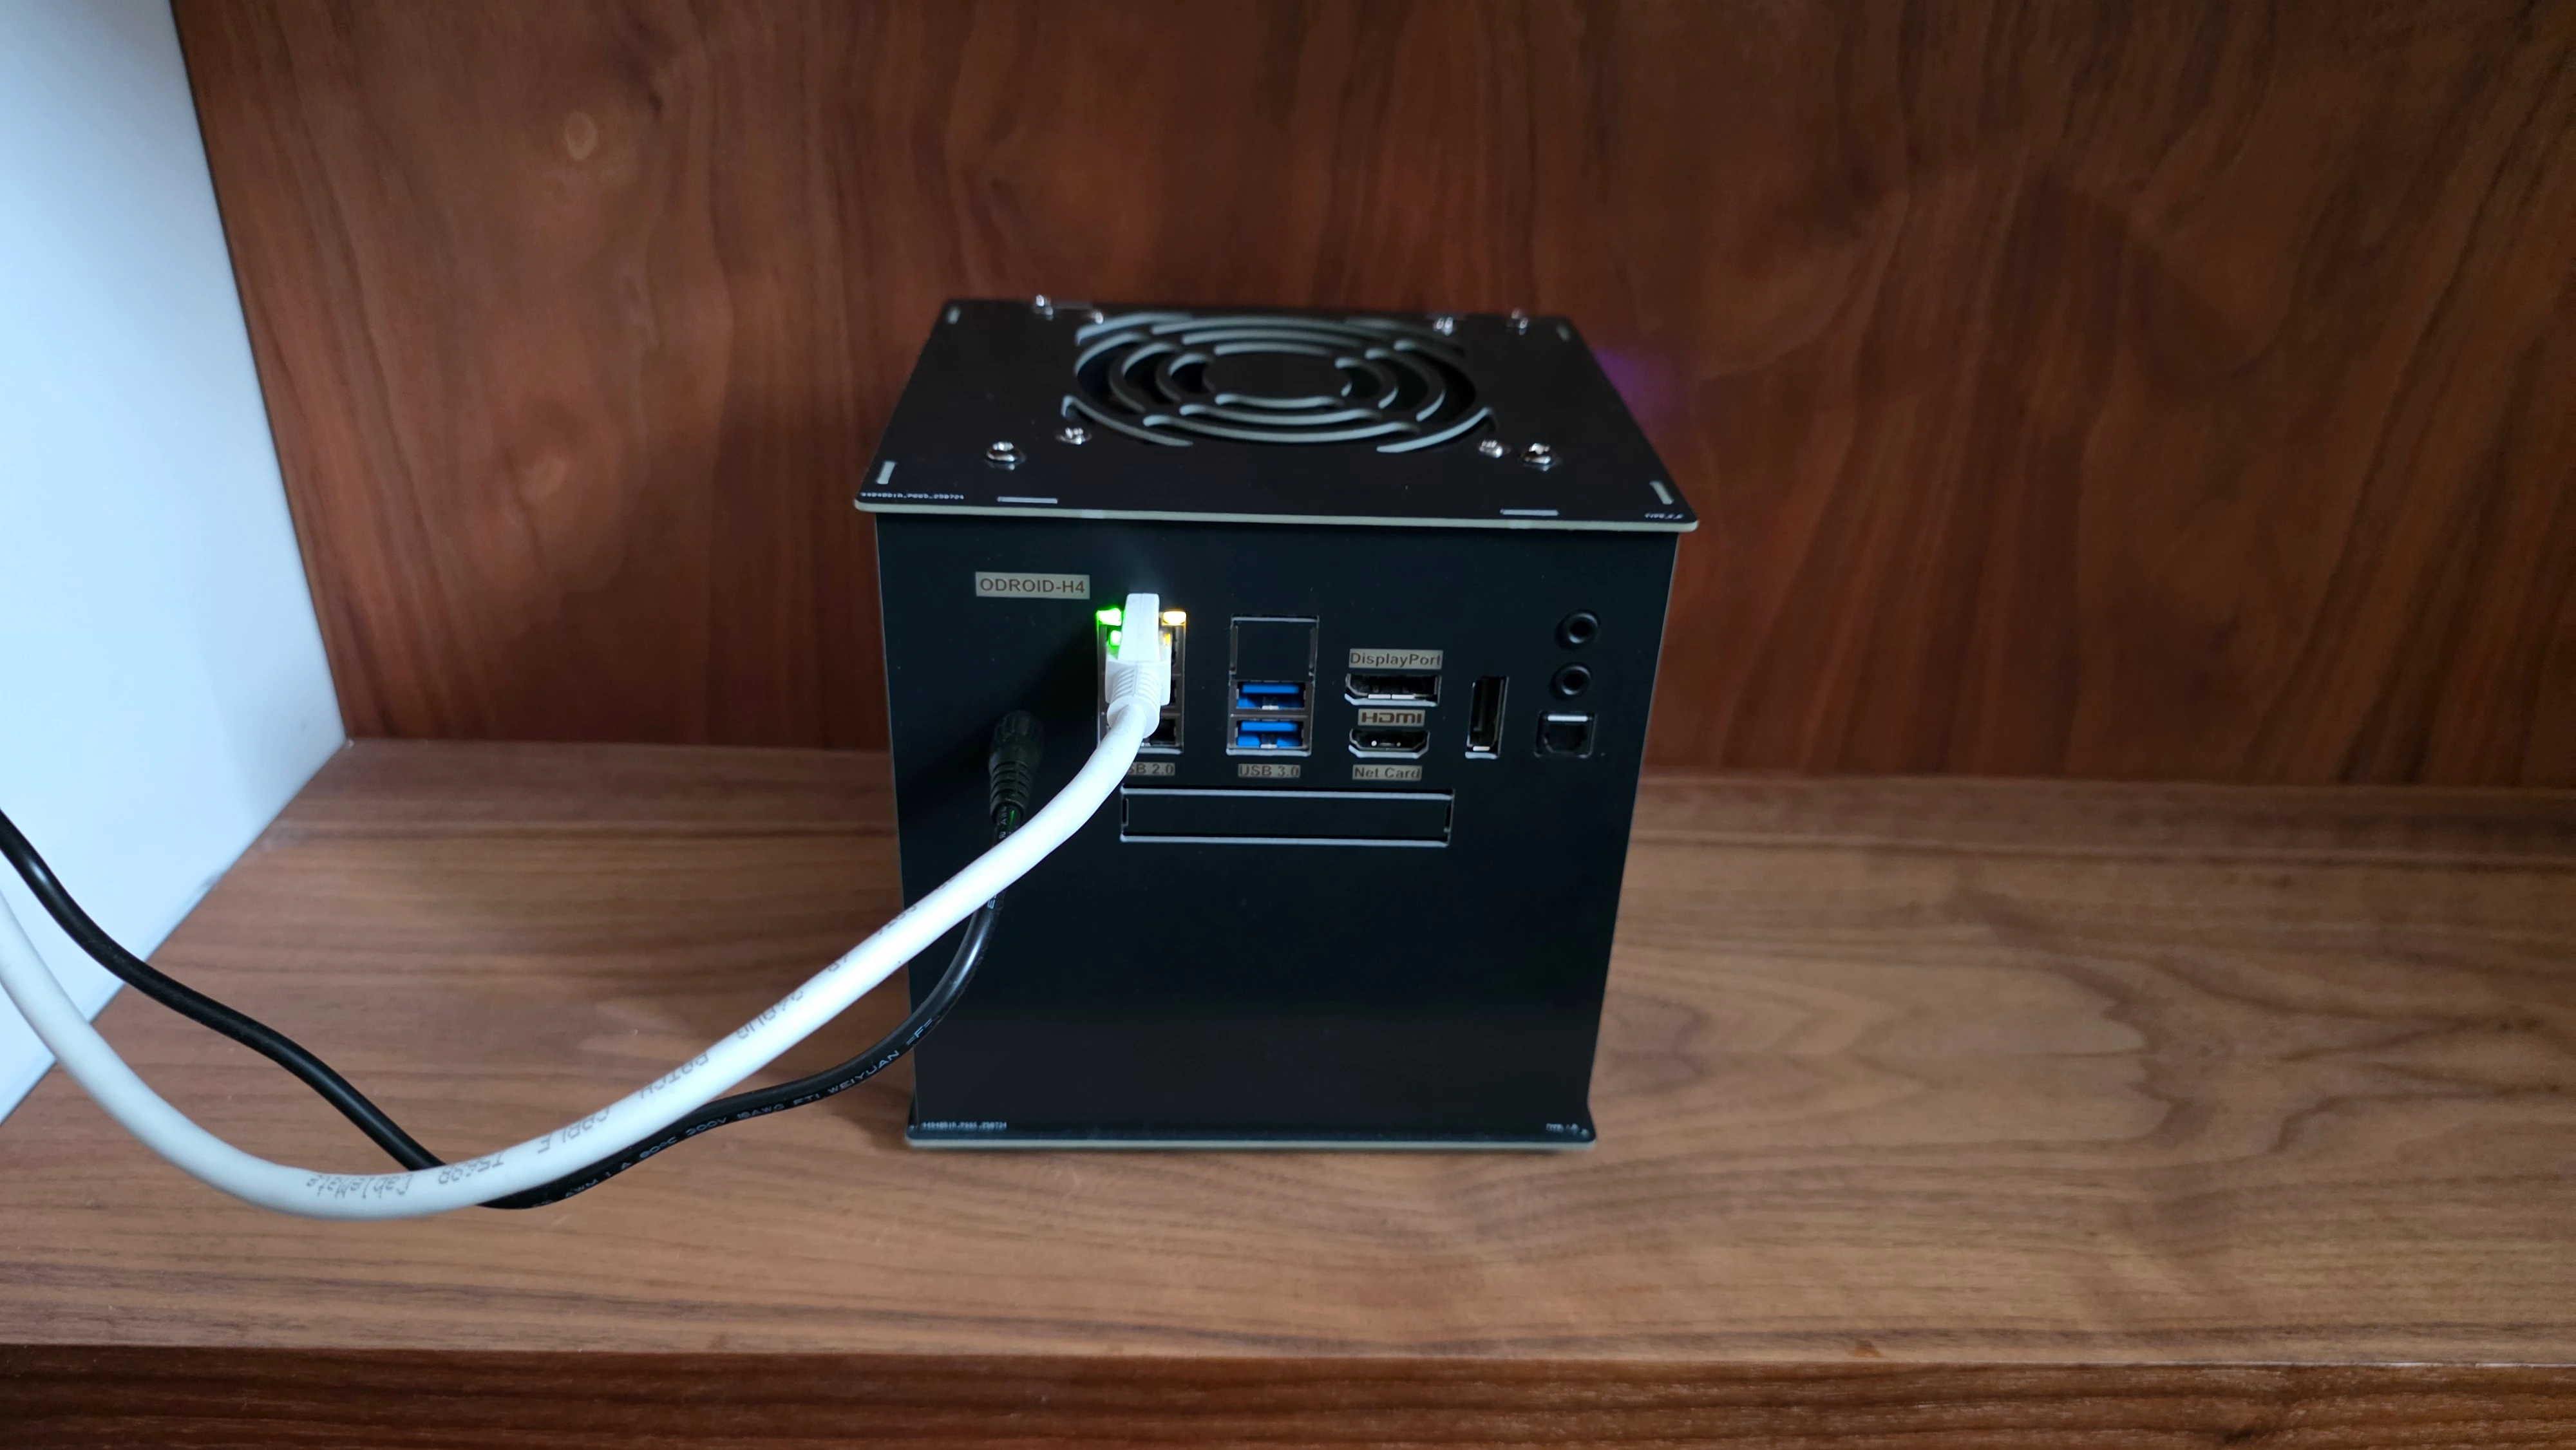
I wanted a small, quiet, low-maintenance home server that can run a Bitcoin node and a handful of self-hosted apps (photos, files, media) — mainly to gain back my privacy, rely less on third-party services, and use open-source software — without turning it into a full-time homelab job.
This is what I ended up with, what worked well, and what I’d do differently next time
This gives plenty of headroom for apps and containers. The only real bottleneck sometimes are CPU-heavy workloads.
I went with Umbrel because it’s ridiculously easy to get to a working system fast. I’m not trying to run a hardcore NAS with complex RAID management, and Umbrel keeps things simple.
Alternatives I considered:
Umbrel updates and the “custom changes get wiped” reality
One important caveat: Umbrel OS updates reset custom Debian-level changes and anything installed/modified outside Umbrel’s intended system. Updates don’t happen often, but when they do, I have to re-apply my custom setup by running a few scripts.
For me, that mainly includes:
So while Umbrel works out of the box most of the time, the moment you go beyond defaults, you’ll want a small “post-update” script folder to get back to a working state quickly.
If you’re curious, I list all of my post-update scripts in the Scripts & automation chapter at the bottom
Umbrel is not perfect, but for a “Bitcoin node + apps” box it’s a great baseline.
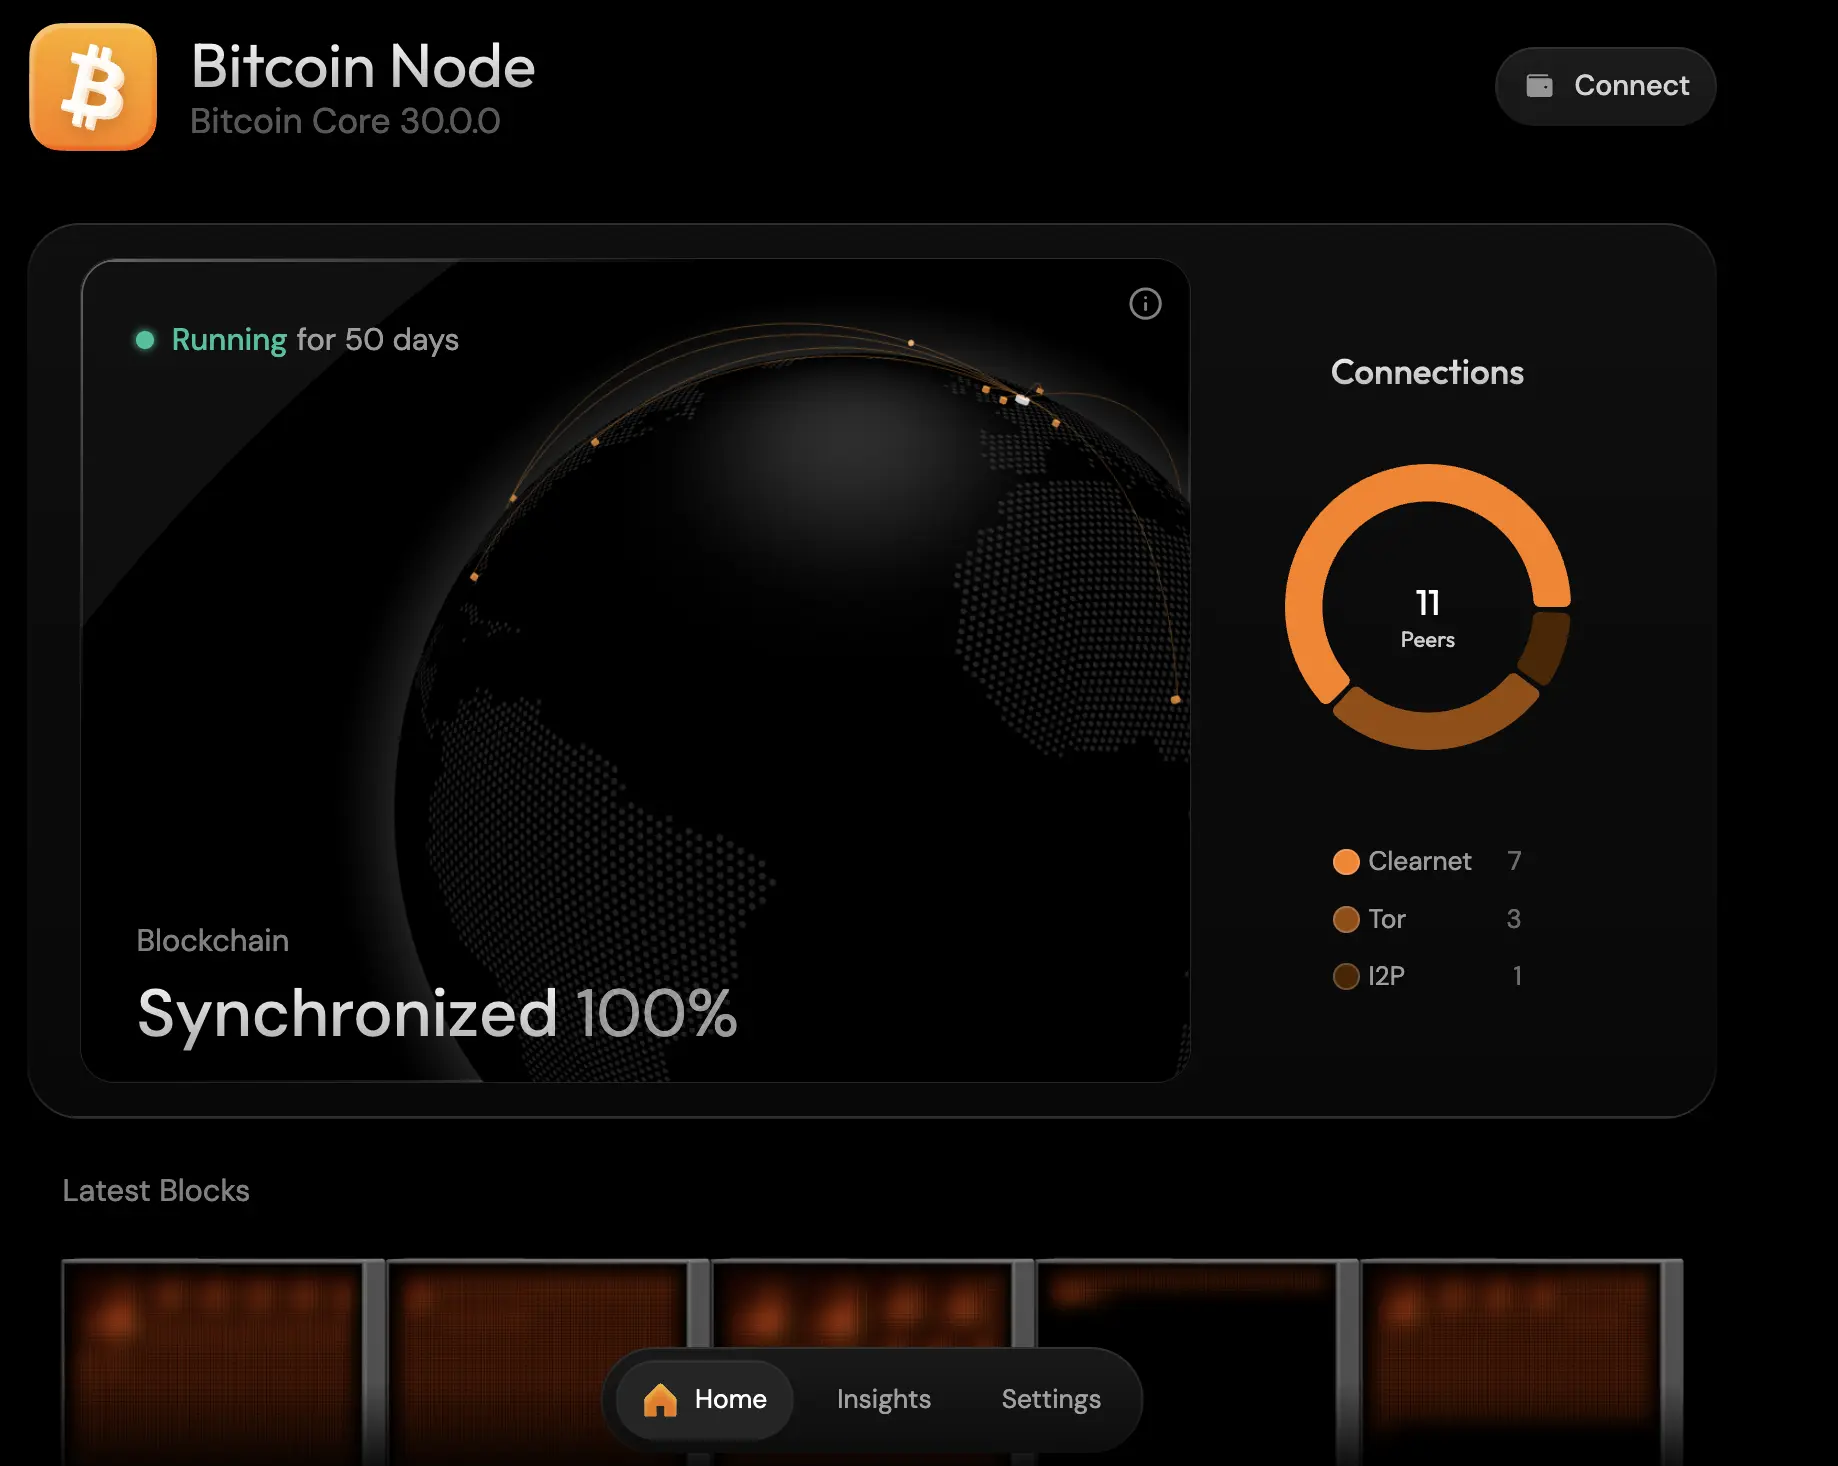
Running a Bitcoin full node is the core reason I built this server. It lets me verify the chain myself instead of trusting third-party infrastructure, and it’s a simple way to contribute back to the network. Umbrel also makes it surprisingly pleasant with a nice UI.
For connectivity, I enabled Clearnet, Tor, and I2P for better peer diversity. Other than the disk footprint (around ~850GB and growing), it doesn’t need much ongoing attention once it’s fully synced.
Remote access was a must for me. I want to reach my server from my laptop/phone anywhere, without exposing my home IP or opening ports on my router.
That’s why I use Tailscale: it gives you a private VPN overlay network that just works instantly, and it’s trivial to add new devices. Just Install the Tailscale app on Umbrel and all devices (MacBook, phone, etc.) and login. It’s super fast, WireGuard-based and encrypted.
You can share the server with friends or family in the Tailscale dashboard (by clicking on the machine and on “share”)
MagicDNS is the cherry on top. It lets me use friendly hostnames like umbrel instead of remembering IPs, so I can just open http://umbrel:2283 from anywhere on my tailnet. It’s ridiculously convenient.
Exit Node
Sometimes I route my internet traffic through my home server by using it as a Tailscale exit node (basically “VPN via my own box”). You need to enable the exit node in the Tailscale admin dashboard**.** To set it up you need to:
ACLs (don’t skip this)
{
  // High-level idea:
  // - autogroup:owner (you) gets full access to your server apps
  // - autogroup:shared (guests) only get a small allowlist of apps
  // - exit-node is explicitly allowed for only for you
  "grants": [
    // ============================================================
    // 1) Me (owner) <-> Server
    // ============================================================
    {
      "src": ["autogroup:owner"],
      "dst": ["<SERVER_TAILSCALE_IP>"],
      "ip": [
        // --- SSH Access ---
        "tcp:22",
        // --- Umbrel UI ---
        "tcp:80",
        // --- Immich ---
        "tcp:2283",
        // --- Jellyfin ---
        "tcp:8096",
		// --- Add the rest ---
      ]
    },

    // ============================================================
    // 2) Me (owner) <-> Backup Server (if you want backup)
    // ============================================================
    {
      "src": ["autogroup:owner"],
      "dst": ["<BACKUP_SERVER_TAILSCALE_IP>"],
      "ip": [
        "tcp:22",
        "tcp:80",
      ]
    },

    // ============================================================
    // 3) Guests <-> Server (restricted allowlist)
    // ============================================================
    {
      "src": ["autogroup:shared"],
      "dst": ["<SERVER_TAILSCALE_IP>"],
      "ip": [
        // Only expose the specific apps you’re comfortable sharing
        // --- Immich ---
        "tcp:2283",
        ]
    },

    // ============================================================
    // 4) Exit node permission (owner -> internet via tailnet)
    // ============================================================
    {
      "src": ["autogroup:owner"],
      "dst": ["autogroup:internet"],
      "ip": ["*"]
    }
  ],

  // ============================================================
  // SSH policy (Tailscale SSH, separate from network ACLs)
  // ============================================================
  "ssh": [
    {
      "action": "check",
      "src": ["autogroup:owner"],
      "dst": ["autogroup:self"],
      "users": ["autogroup:nonroot", "root"]
    }
  ],
}I use NordVPN as an extra privacy layer for outbound traffic. The idea is simple: even if my server is reachable via Tailscale, its internet traffic can go out through a VPN.
Where it sits in the stack
VPN kill switches often mess with docker or Tailscale. I created some scripts to setup everything. See script section below.
I run Jellyfin as my private Netflix replacement. It’s fast, free, open-source, works great on TV/phone/laptop, and I like that it’s fully under my control. It’s my central media library for movies, series, and online courses.
Must do: To make it run smoother enable hardware transcoding in the settings. Playback → Transcoding → under Hardware Acceleration → enable VAAPI.
I use Immich as my self-hosted replacement for Google Photos. It gives me fast search, albums, a great mobile app, and most importantly - my photos stay on my own hardware. There’s a mobile app and it feels just like Google Photos. Don’t forget to enable auto-backup for folders on your phone.
I migrated from Google Photos. For this you can use Google Takeout to export all your Google photos content and Immich-Go to easily insert it into your immich setup. Just follow the Immich-Go instructions.
I use Nextcloud for file storage and sharing across devices. It’s basically my private OneDrive. For security reasons, I keep two accounts: an admin account and my normal user account. And I enabled 2FA for both.
For ebooks and audiobooks I use two apps:
Calibre Web (ebooks)
Calibre Web gives a nice web UI for browsing your ebooks and managing it’s metadata. For format conversion (PDF → EPUB), I usually use online tools because it’s easier (like CloudConvert) but you can also setup Calibre’s own conversion tools.
Audiobookshelf (audiobooks)
Audiobookshelf is honestly one of my favourites. I just drop audiobooks into my library folder and it feels like an open-source Audible — great UX and it works perfectly across devices. Managing the audiobook’s metadata is super easy too because it fetches directly from Audible.
1-install-nordvpn.sh
#!/bin/bash
echo "Installing NordVPN..."
sh <(curl -sSf https://downloads.nordcdn.com/apps/linux/install.sh)

echo "Fixing permissions..."
sudo groupadd nordvpn 2>/dev/null
sudo usermod -aG nordvpn $USER

echo "Reboot required for permissions to take effect."
echo "If you want to continue without rebooting, run: su - $USER"

echo "Configuring NordVPN..."
nordvpn set technology nordlynx
nordvpn set autoconnect on
nordvpn set killswitch on
nordvpn set lan-discovery on
# Whitelisting happens inside the connect script

echo "✅ NordVPN installed and configured."
2-login-nordvpn.sh (more of a reminder)
#!/bin/bash
echo "🔐 Run the following command and replace the placeholder. You get the token from your Nordvpn account."
echo "nordvpn login --token <PASTE_NORDVPN_TOKEN>"
3-connect-nordvpn.sh
#!/bin/bash
set -e

# Choose your default VPN country here.
VPN_COUNTRY="Switzerland"

echo "🔄 Enabling auto-connect (so it reconnects after reboots/network blips)..."
sudo nordvpn set autoconnect on "$VPN_COUNTRY"

echo "🛣️  Enabling LAN discovery..."
sudo nordvpn set lan-discovery enable || true

echo "🧱 Whitelisting Docker/Umbrel + Tailscale so containers keep working..."
# Docker default bridge
sudo nordvpn whitelist add subnet 172.17.0.0/16 || true

# Umbrel/Tailscale-in-Docker networks (commonly used in your setup)
sudo nordvpn whitelist add subnet 10.21.0.0/16 || true

# Whitelist Tailscale
sudo nordvpn whitelist add subnet 100.64.0.0/10 || true
sudo nordvpn whitelist add port 41641 || true

# OPTIONAL: If you want certain app ports reachable even with strict rules.
# Usually not needed if subnets are whitelisted, but safe to keep.
sudo nordvpn whitelist add port 2283 || true   # Immich
sudo nordvpn whitelist add port 8096 || true   # Jellyfin

echo "🛡️ Enabling kill switch..."
sudo nordvpn set killswitch on

echo "🌐 Connecting to NordVPN ($VPN_COUNTRY)..."
nordvpn connect "$VPN_COUNTRY"

echo "✅ Connection status:"
nordvpn status
4-disconnect-nordvpn.sh
#!/bin/bash
set -e

echo "🚪 Running VPN disconnect sequence..."

# Optional: Run a script to stop some apps
# ./stop-apps.sh
# if [ $? -eq 0 ]; then
# ...
# else
#   echo "⚠️  Some apps failed to stop. VPN will remain connected."
# fi

echo "Disabling Kill Switch..."
sudo nordvpn set killswitch off

echo "🔌 Disconnecting VPN..."
nordvpn disconnect

echo "🚫 Disabling Auto-Connect..."
sudo nordvpn set autoconnect off

# Optional if you use cloudflared without the vpn
# echo "Enable Cloudflared again"
# sudo systemctl enable --now cloudflared-dns
# sudo bash -c 'echo "nameserver 127.0.0.1" > /etc/resolv.conf'

echo "✅ Final status:"
nordvpn status


.webp)


